This is a bit of a WIP article written quickly for now I'll improve it soon-ish
Using the Material
Color Mask Metallic is (as far as I know) the only way to have separate color zones without doing camera tricks.
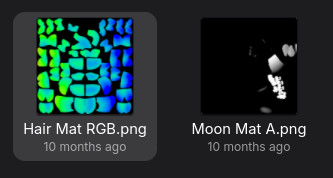
I have my Moontail's setup here. The ColorMask controls where on the texture each color zone is applied. With zone 0 being R to zone 3 being the alpha channel.
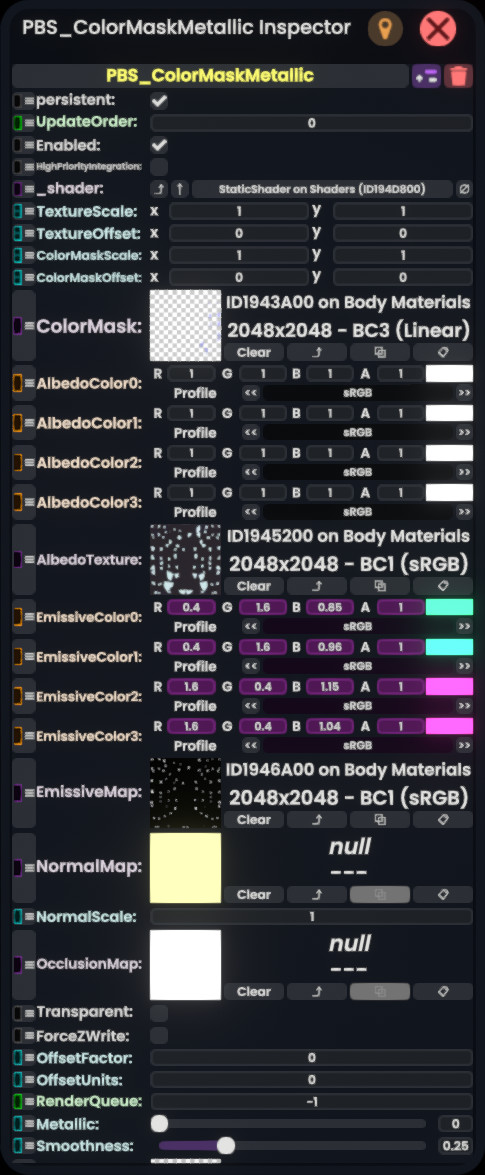
The Albedo of all the zones is white, so that it just uses the original texture, and the emissives are the actual colors it should use. The B/W emissive mask is just to limit where the glow comes from.
ColorMap Quirks
There are a few quirks with the ColorMask:
- First, you can see that it looks almost blank, but that is because the most of the colors are in the area where alpha is 0.
- Second, the tints of the colors are normalized in a weird way when they overlap. This is usually fine for this use though.
- Last, if all channels are 0, the output is just black.
Creating the ColorMap
The ColorMap is a bit tricky to create, because it is likely that a lot of it will be "hidden" in areas with 0 alpha.
Blender Nodes
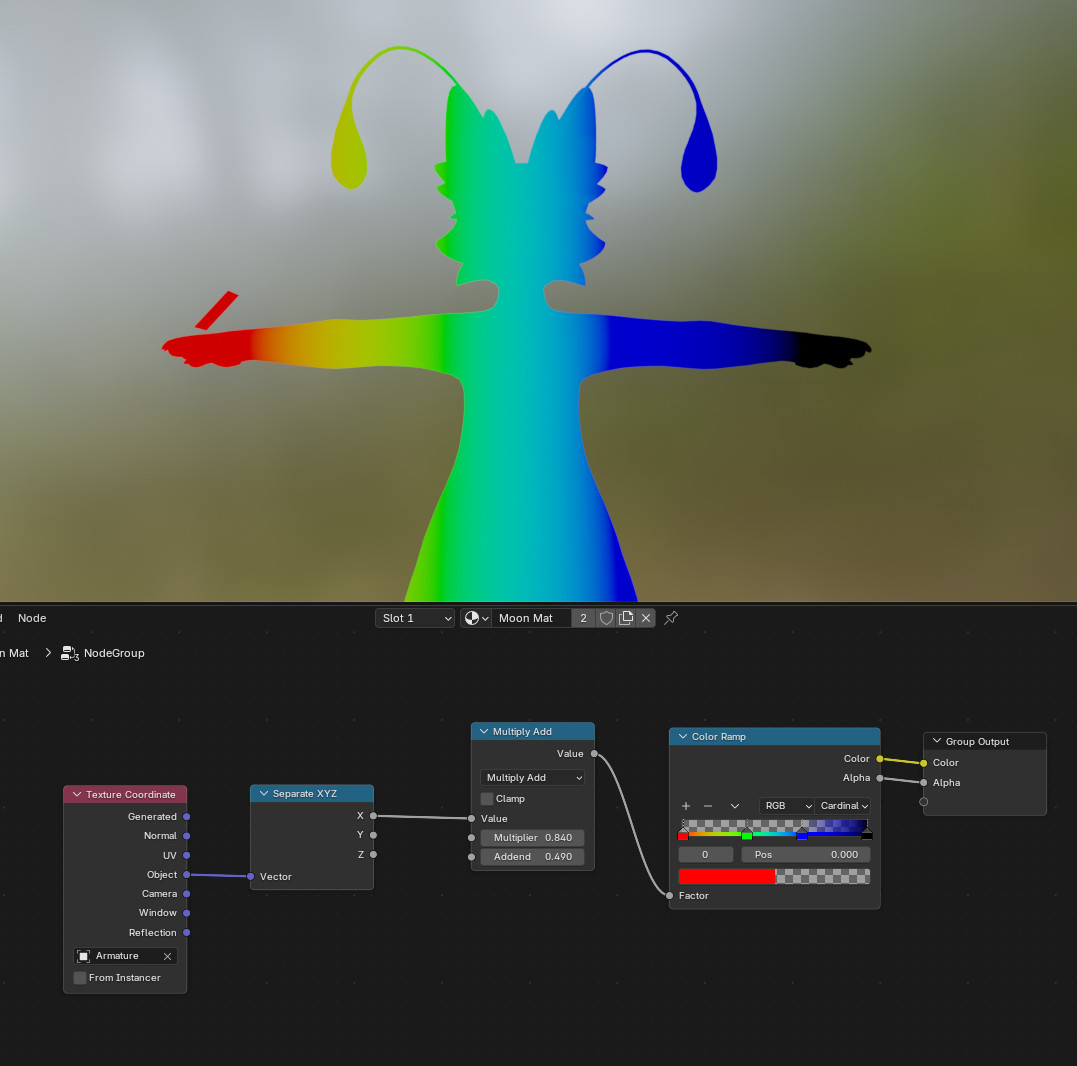
In my case, I just needed the color mask to give smoothly transitioning zones from left to right. For this, I made a node group that maps the object's X coordinates to a color ramp.
I then bake both images separately as emissives.
Combining the Masks
To combine the masks, just I just apply the alpha mask as the actual alpha channel of the image.
I usually use the GNU Image Manipulation Program. There, the color compose and decompose tools can be used. When saving the resulting PDF, it is important to check the "Save color values from transparent pixels" option.
Another alternative is to use the PBS Texture Merger site, to add the opacity map.
Last, in my case, I made a python script for this, so that I can properly configure all my avatar's textures in batch.